May 09, 2024
Xcode Localization
Learn how to localize your iOS, macOS, visionOS, watchOS, and tvOS apps with this step-by-step Xcode guide. Export, upload, and review translations for 40+ languages.
If you build apps for iOS, macOS, visionOS, watchOS, or tvOS, Xcode’s String Catalog is the fastest way to keep every language in sync.
This guide works with Xcode 15 or later. We’ve refreshed it for Xcode 26, which adds optional AI-generated context comments—handy, but not required.
Prerequisites
- Xcode 15+ (Xcode 26 recommended if you want auto-generated comments)
- A free String Catalog account
- Either
- a GitHub repository you can connect or
- exported
.xcstrings/.xclocfiles you’ll upload manually
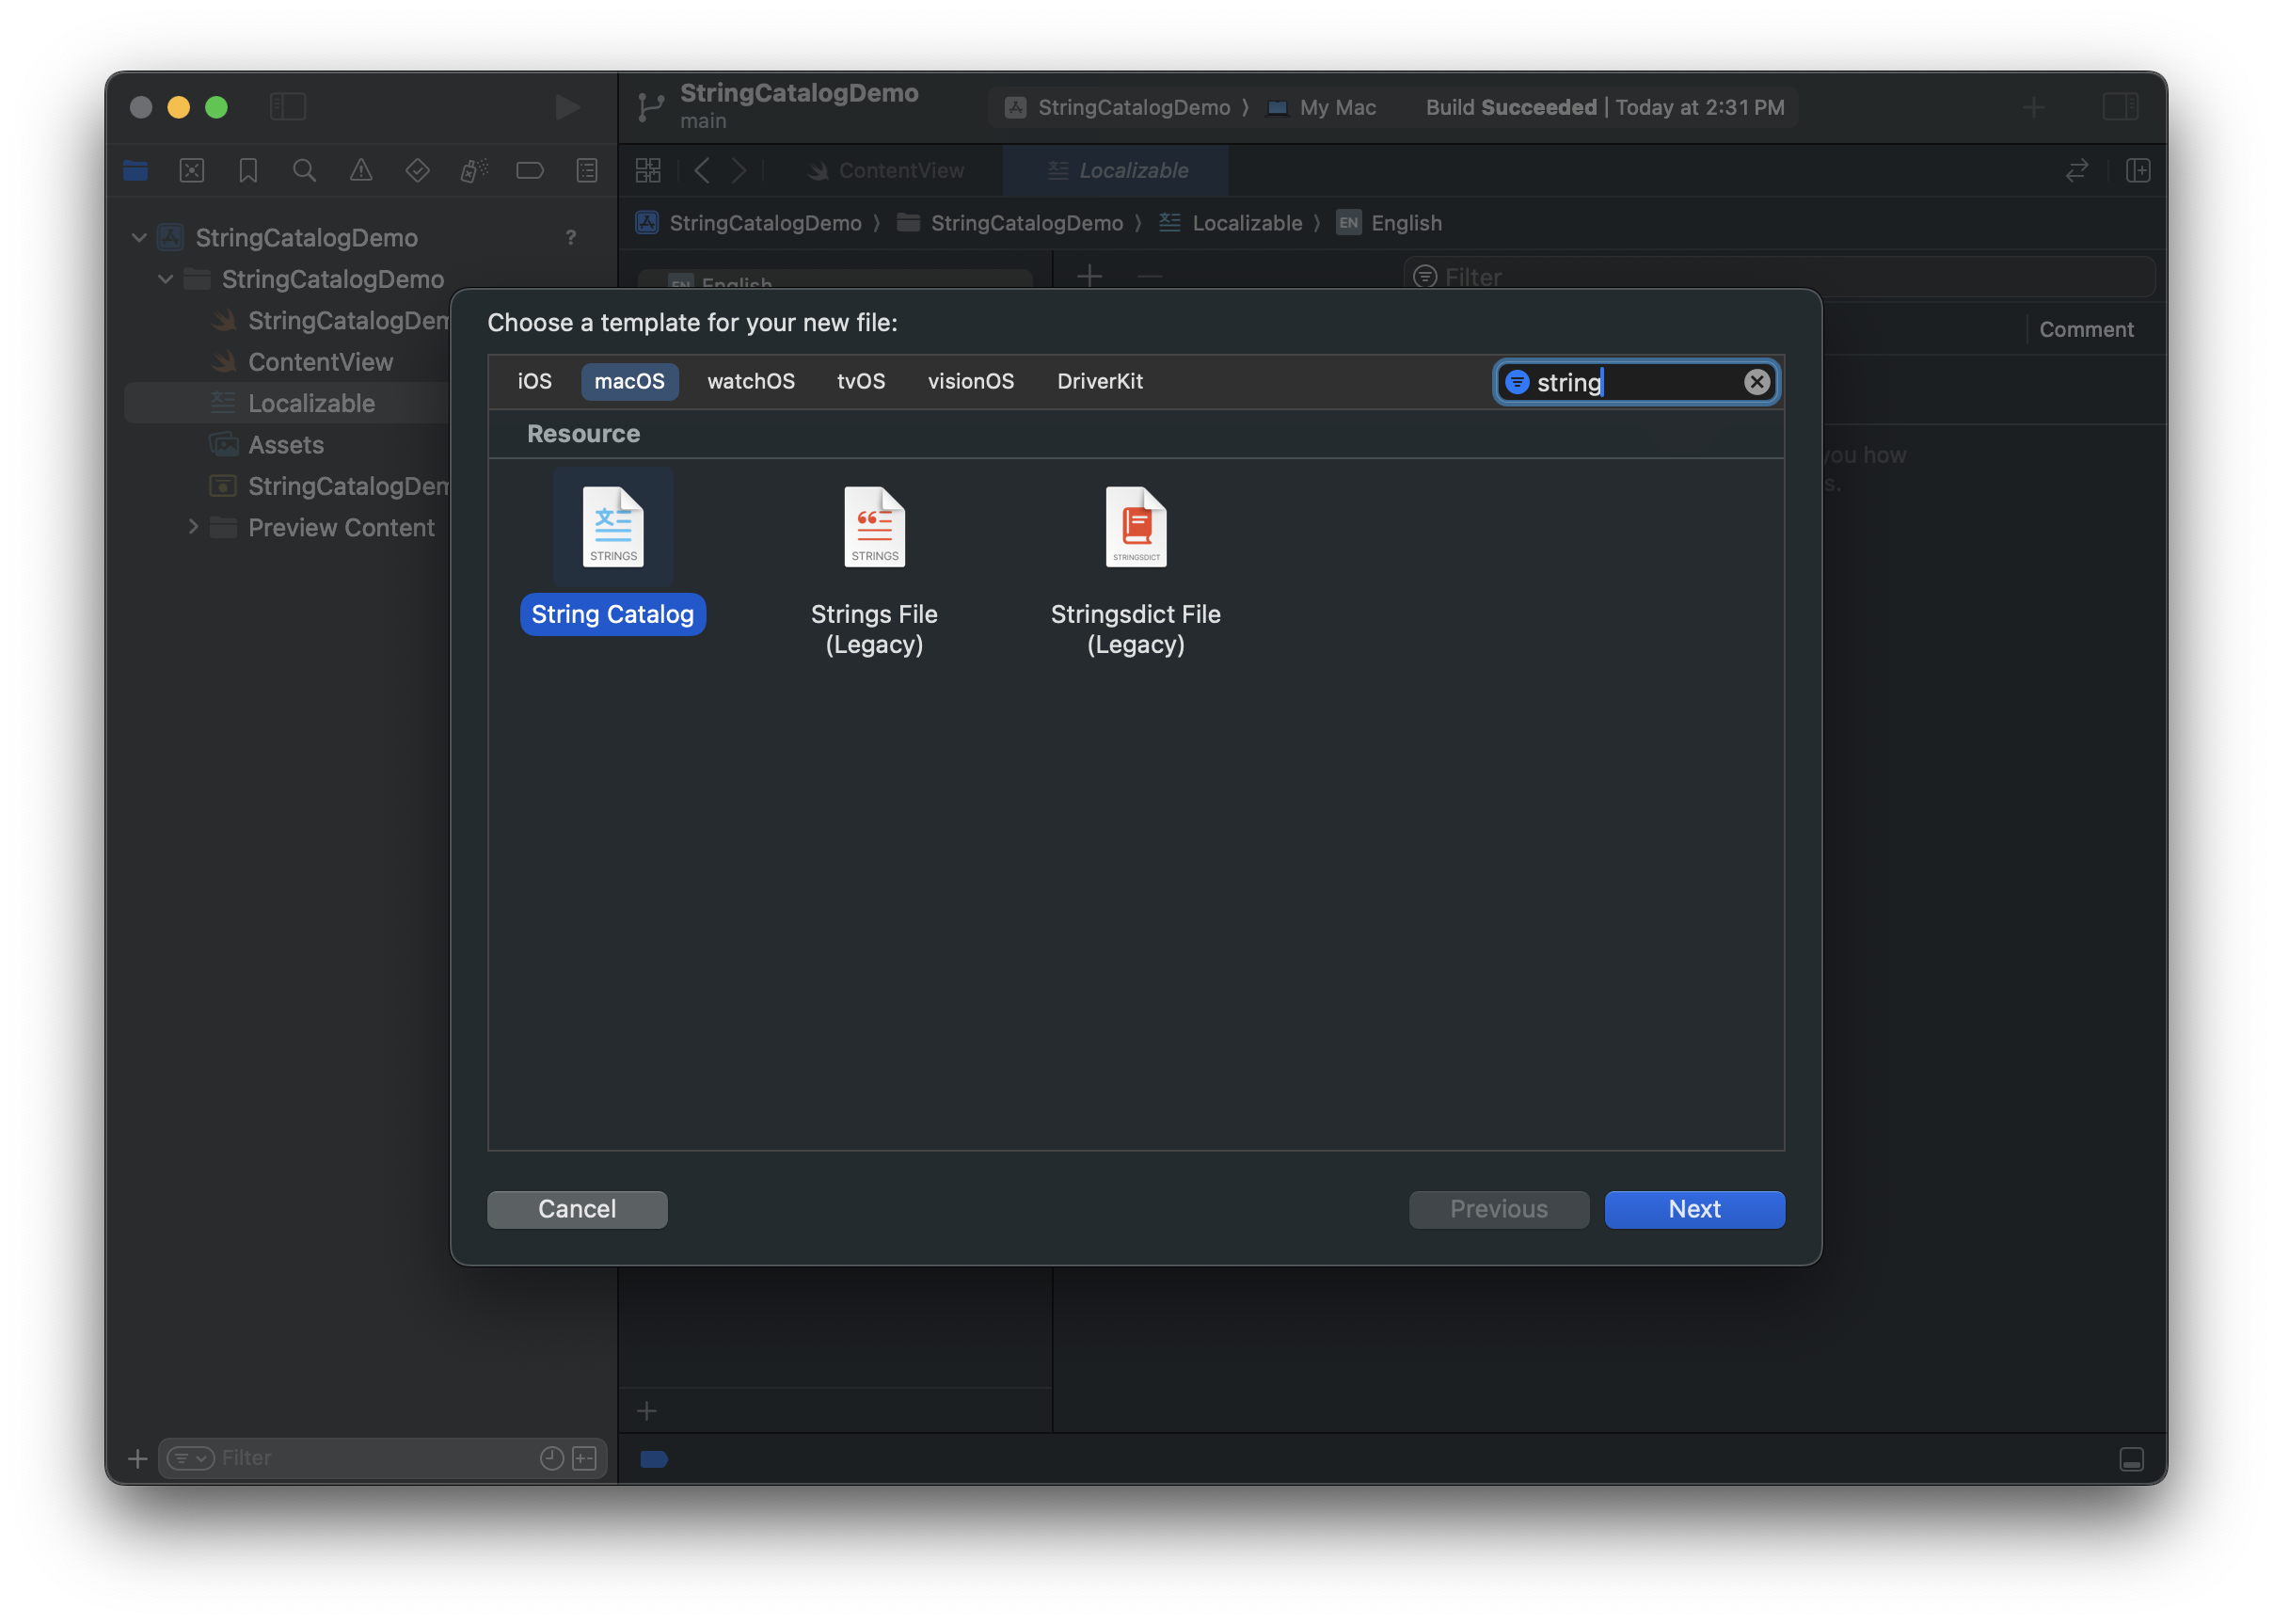
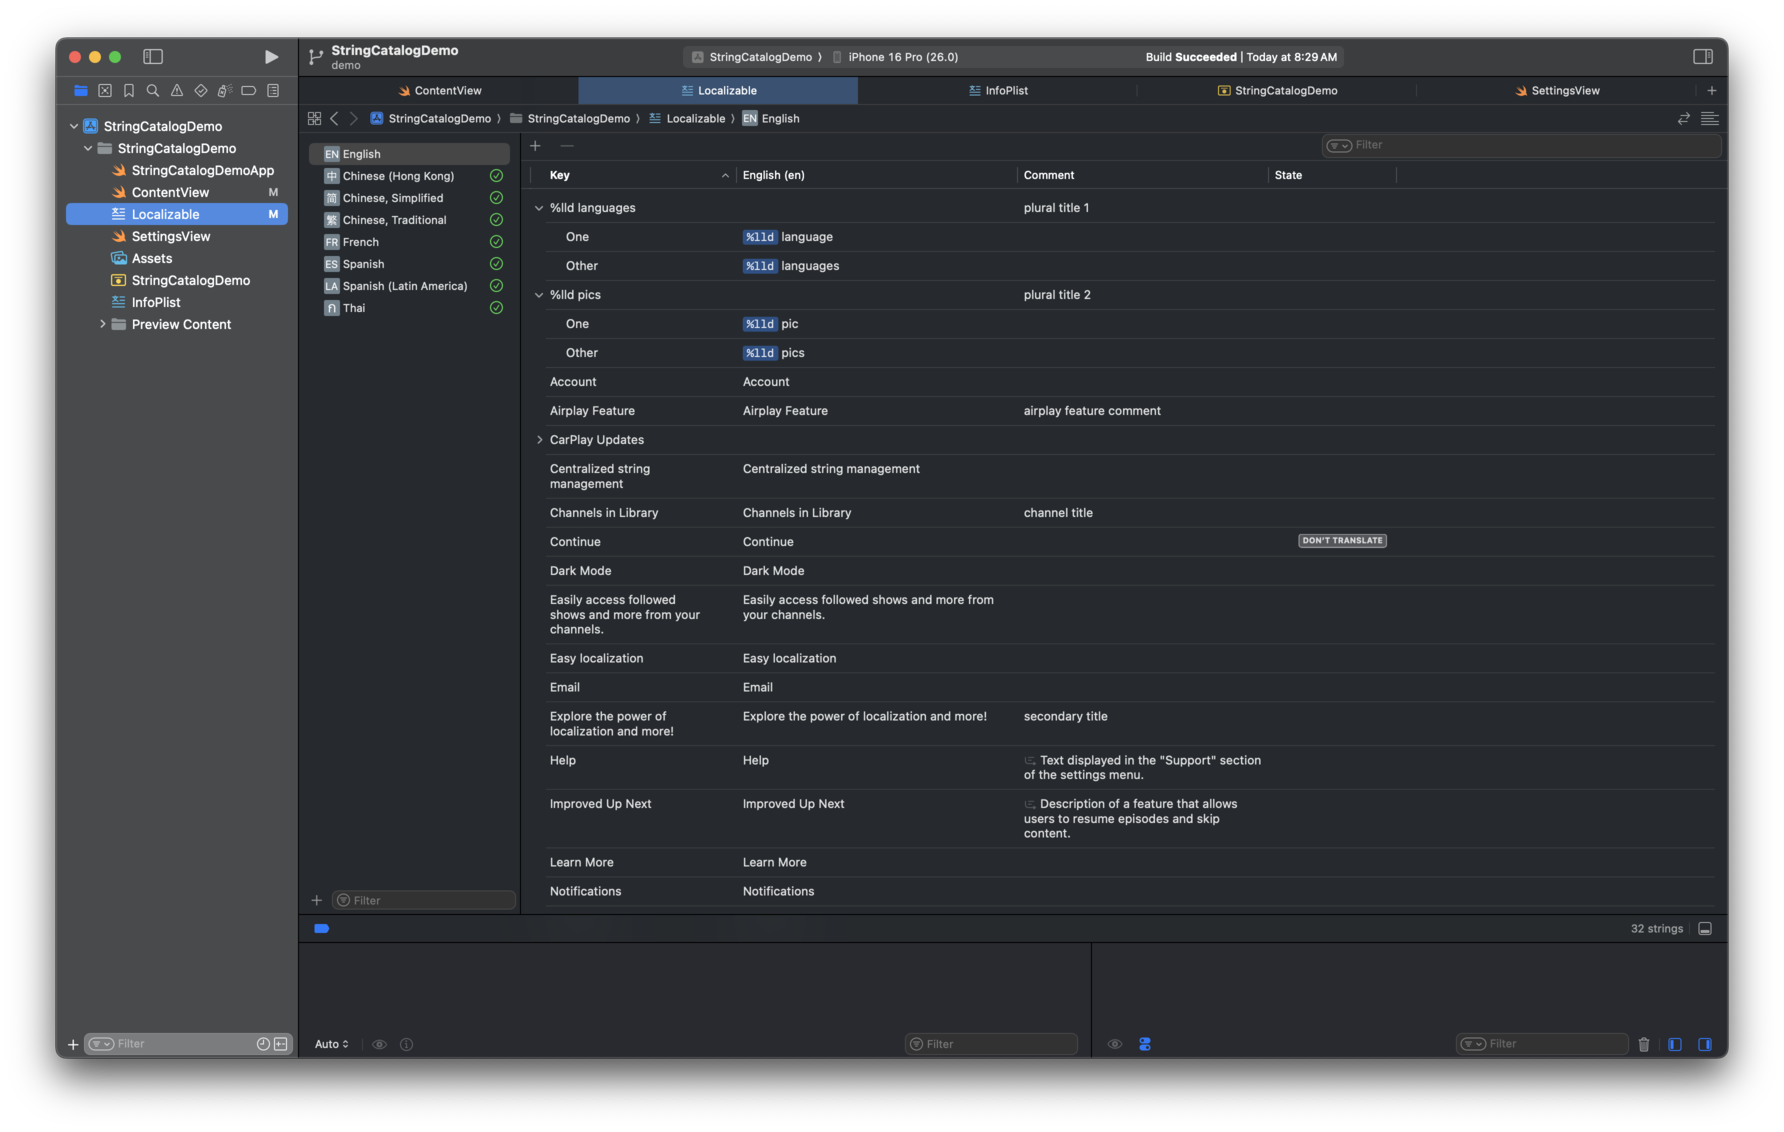
Step 1 – Create a String Catalog
- In Xcode choose File ▸ New ▸ File ▸ String Catalog.
- Build once so Xcode harvests every string, e.g.
Text("Show Badges", comment: "Toggle visibility of the badge list")
- (Xcode 26 only) Turn on automatic comments at Xcode ▸ Settings ▸ Editing ▸ Automatically Generate String Catalog Comments.
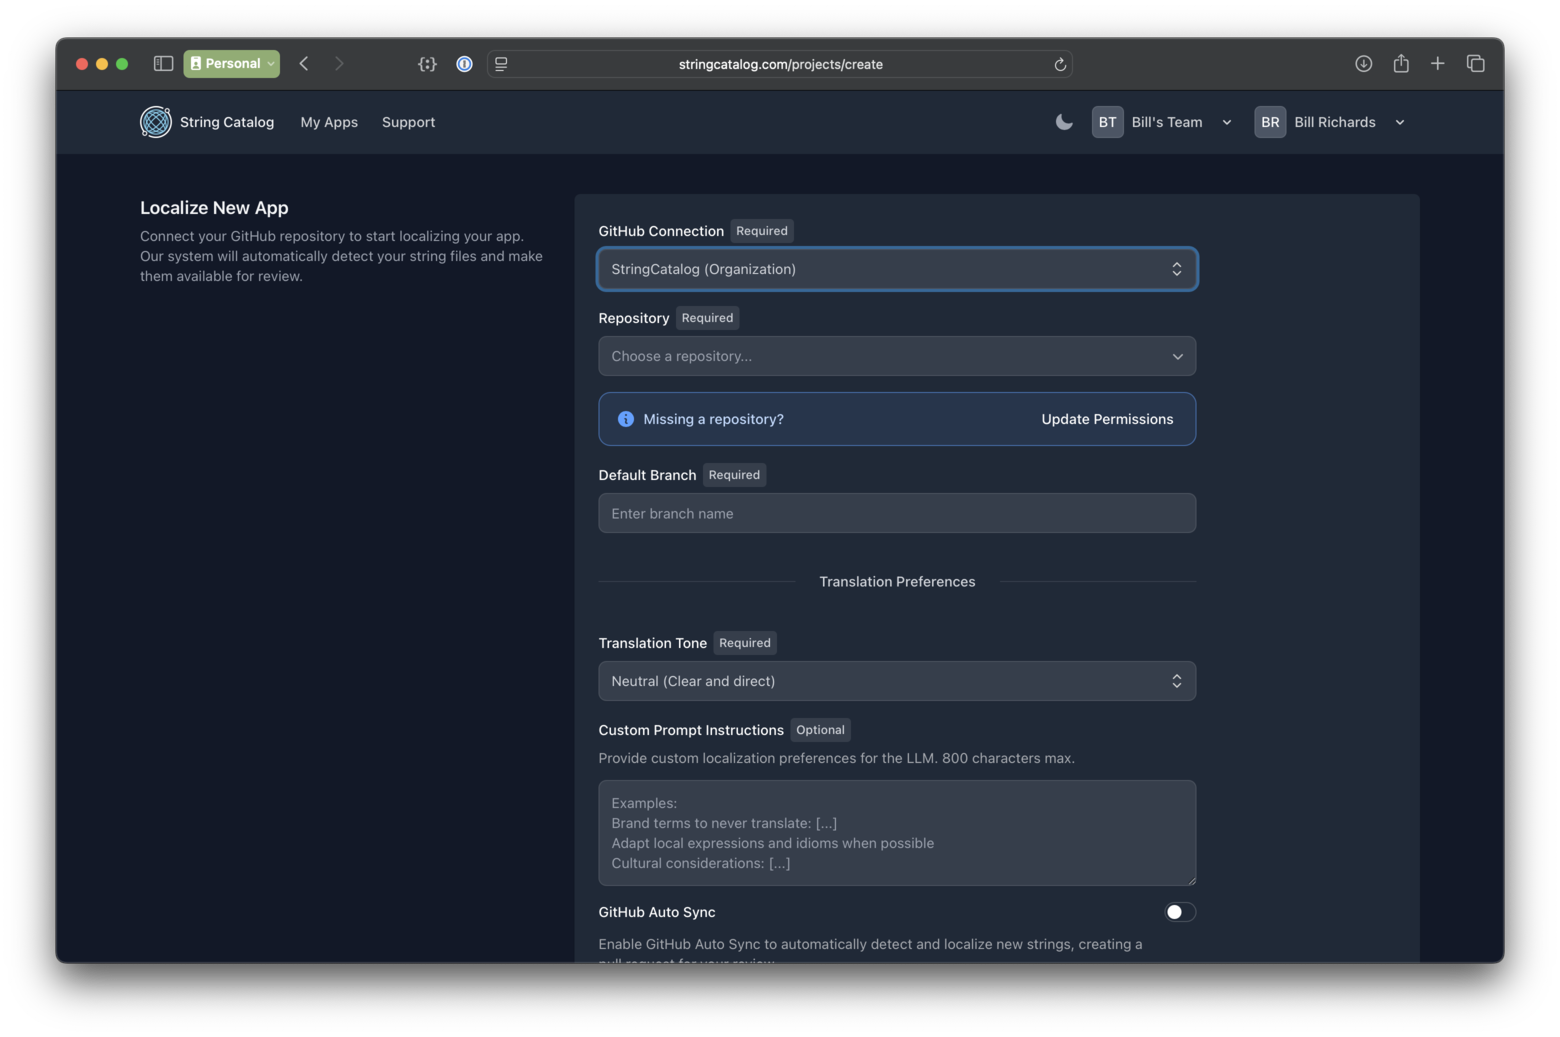
Step 2 – Connect String Catalog App
Option A – GitHub Integration (recommended)
- In your String Catalog dashboard click Connect GitHub.
- Authorize our GitHub App and select the repo you want localized.
- First sync pulls your
.xcstringsautomatically; future commits trigger new syncs.
Option B – Manual Upload
- In the dashboard click Upload Files and drop in your
.xcstringsfiles. - Each time you add or change strings in Xcode you’ll repeat this upload step.
- After translations are ready you can download the updated
.xcstringsbundle back to Xcode.
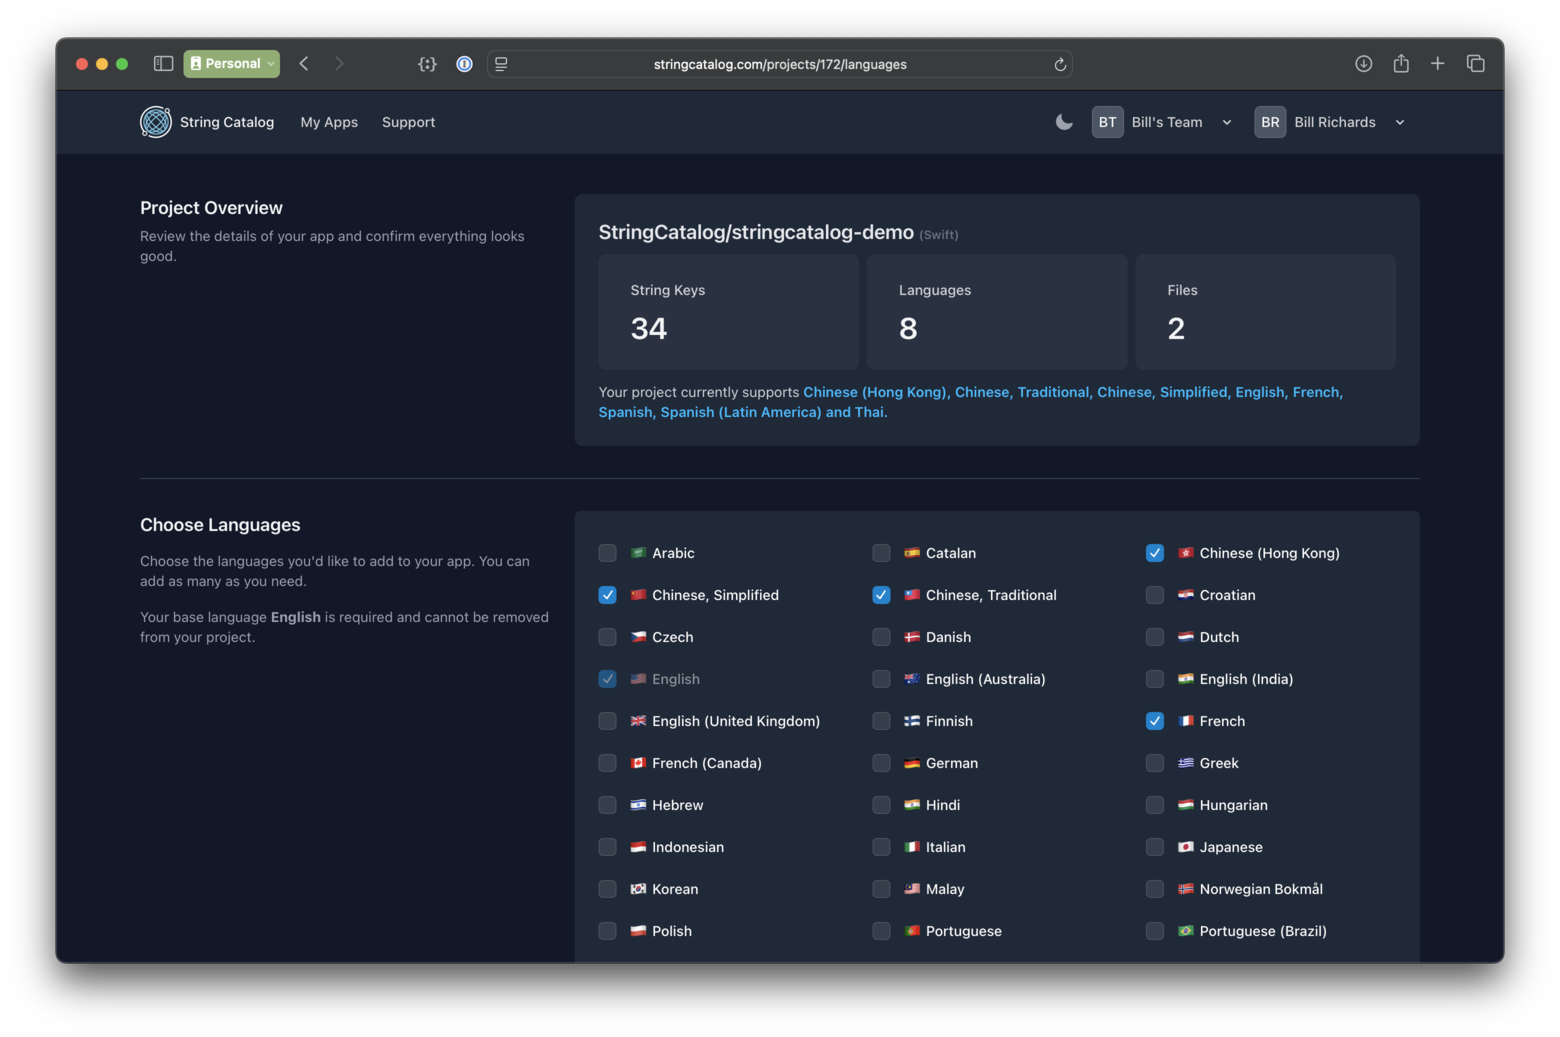
Step 3 – Add Languages
- Click Add Languages.
- Choose from 40+ locales.
Free accounts can add one language once as a trial; continuous sync starts on paid plans.
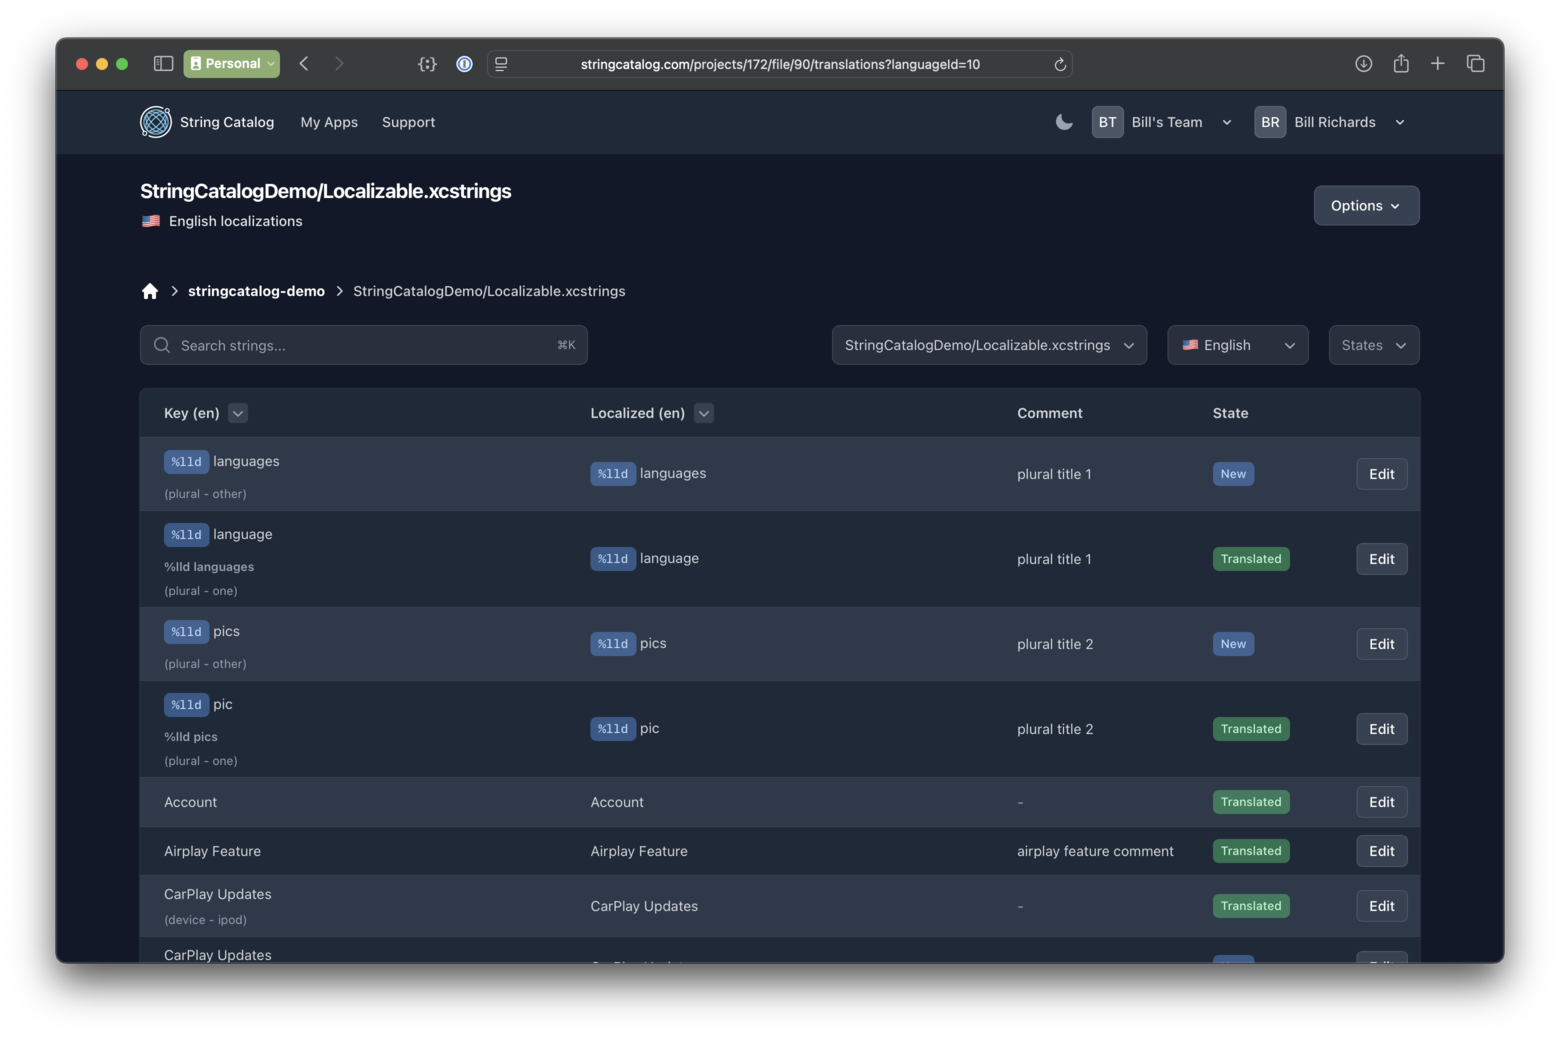
Step 4 – Translate with Context
- AI reads every context comment (manual or auto-generated) for high accuracy.
- Flags like Don’t Translate and Marked for Review are respected.
- Custom prompts, tone controls, and automatic stale-string cleanup are available on paid plans.
- The Quality Checker (Pro / Business) scores translations and flags any that look off.
Step 5 – Sync & Review Changes
| If you… | You’ll get… | How to review |
|---|---|---|
| Connected GitHub | An automatic pull request with localized .xcstrings |
Use GitHub’s diff viewer, then merge when satisfied |
| Uploaded manually | A download button for an updated .xcstrings bundle |
Grab the bundle and inspect files locally |
Step 6 – Import Back into Xcode
- GitHub flow: merge the PR—done, strings are already on
main. - Manual flow: replace your .xcstrings files manually
Step 7 – Verify in Xcode
Run the app in your new locale. Placeholders (%@, %lld, etc.) and plural rules should render correctly.
FAQs
What is Xcode localization?
Xcode localization is the process of translating your app's user interface into different languages using Xcode's built-in tools like String Catalog and .xcloc files.
How do I localize my app in Xcode?
You can localize your app by setting up a String Catalog, exporting .xcloc files, and then re-importing translated versions into Xcode.
Does Xcode support localization for visionOS and macOS?
Yes! The same process works across iOS, macOS, visionOS, tvOS, and watchOS.
How much does String Catalog cost?
String Catalog starts as low as $15/month for our hobby plan. See all tiers on our pricing page. Student discounts available.
Do I need to export every time?
Not if you use GitHub Auto-Sync (paid). Manual uploads require re-uploading whenever you add new strings.
What happens if I mark a string for review in Xcode?
StringCatalog detects Marked for Review and re-translates that entry on the next sync.
Start Localizing Today
Ready to reach users worldwide? Sign up for free and translate your first language on us. Continuous sync, Quality Checker, and advanced AI controls await on our Pro and Business plans.